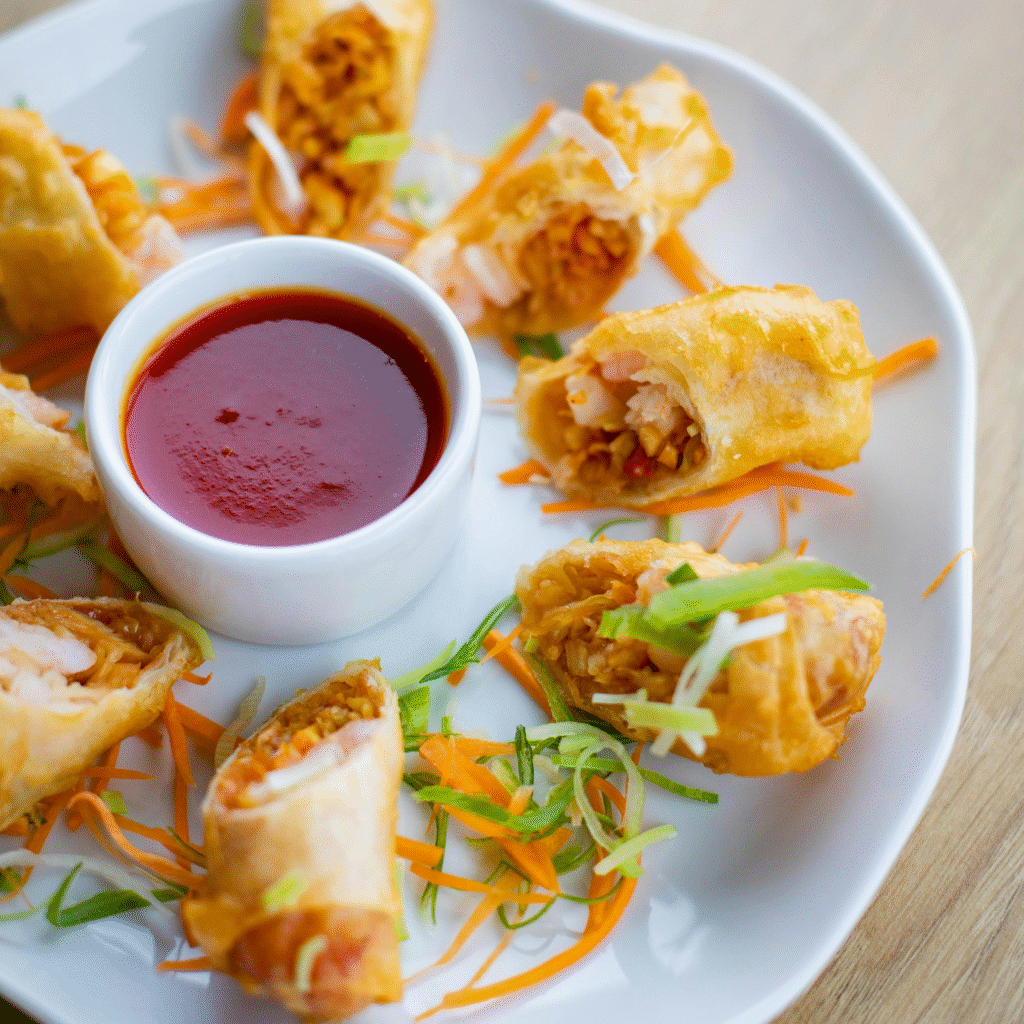
Imagine the delightful shatter of a perfectly golden-brown wrapper, giving way to a steaming, savory filling packed with fresh vegetables and your favorite protein. These homemade spring rolls are more than just an appetizer; they’re little bundles of joy, a truly comforting experience you can create right in your own kitchen. What makes this recipe so special is the balance – an incredibly crisp exterior without being greasy, and a filling that’s bursting with flavor, not too wet, not too dry, just right. Perfect for a cozy night in, a fun weekend cooking project, or as a star appetizer that will have everyone reaching for more.
Time & Serving:
Prep Time: 45 minutes
Cook Time: 20 minutes
Cooling/Resting Time: 15 minutes
Total Time: 1 hour 20 minutes
Servings: 18-20 spring rolls
Ingredients:
For the Flavorful Filling:
▢ 1 tablespoon vegetable oil
▢ 2 cloves garlic, minced
▢ 1-inch piece ginger, grated
▢ 1/2 pound ground pork or chicken
▢ 1 cup carrots, julienned
▢ 2 cups Napa cabbage, thinly sliced
▢ 1 cup fresh bean sprouts
▢ 4-5 dried shiitake mushrooms
▢ 50 grams glass noodles
▢ 2 tablespoons soy sauce
▢ 1 tablespoon oyster sauce
▢ 1 teaspoon sesame oil
▢ 1/4 teaspoon white pepper
▢ 1 green onion, thinly sliced
For Wrapping & Frying:
▢ 1 package (18-20 sheets) spring roll wrappers
▢ 1 large egg, beaten (for sealing)
▢ 3-4 cups neutral cooking oil
For the Simple Sweet Chili Dip (Optional):
▢ 1/2 cup sweet chili sauce
▢ 1 tablespoon rice vinegar
▢ 1 teaspoon lime juice
Instructions:
- Prepare the Filling: Heat the vegetable oil in a large skillet or wok over medium-high heat. Add the garlic and ginger and sauté for 30 seconds until fragrant. Add the ground pork/chicken (or tofu) and cook, breaking it apart with a spoon, until browned and cooked through, about 5-7 minutes. Drain any excess fat.
- Sauté Vegetables: Add the carrots, Napa cabbage, and rehydrated shiitake mushrooms to the skillet. Stir-fry for 3-4 minutes until the vegetables are tender-crisp. You want them softened but still with a little bite.
- Combine & Season: Stir in the soaked and cut glass noodles, soy sauce, oyster sauce, sesame oil, and white pepper. Cook for another 2 minutes, allowing the noodles to absorb the sauce. Remove from heat and stir in the bean sprouts and green onion. Taste and adjust seasoning if needed.
- Cool the Filling: Transfer the filling to a bowl or spread it on a baking sheet to cool completely for at least 15 minutes. This is crucial; a warm filling will make the wrappers soggy and prone to tearing.
- Wrap Your Spring Rolls:
- Lay one spring roll wrapper on a clean, dry surface with one corner pointing towards you (like a diamond). Keep the remaining wrappers covered with a damp cloth to prevent them from drying out.
- Place 2-3 tablespoons of the cooled filling horizontally near the bottom corner closest to you.
- Fold the bottom corner up and over the filling.
- Fold in the two side corners towards the center, snugly.
- Roll the spring roll up tightly towards the top corner.
- Brush the top corner with a little beaten egg (or cornstarch slurry) and seal the roll. Repeat with the remaining wrappers and filling.
- Fry to Golden Perfection:
- In a deep, heavy-bottomed pot or Dutch oven, pour in cooking oil to a depth of at least 1.5 inches. Heat the oil over medium-high heat until it reaches 350°F (175°C). If you don’t have a thermometer, a small piece of wrapper should sizzle and turn golden in about 30-45 seconds.
- Carefully place 3-4 spring rolls into the hot oil, being sure not to overcrowd the pot (this lowers the oil temperature).
- Fry for 3-5 minutes, turning occasionally, until they are beautifully golden brown and crispy all over.
- Remove the cooked spring rolls with a slotted spoon and transfer them to a wire rack set over a baking sheet to drain any excess oil and keep them crisp.
- Serve & Enjoy: If making the optional dip, simply whisk together the sweet chili sauce, rice vinegar, and lime juice in a small bowl. Serve your delicious, hot spring rolls immediately with your favorite dipping sauce.
Recipe Notes:
- Keep your stack of spring roll wrappers covered with a slightly damp (not wet) paper towel or clean kitchen cloth while you work, as they dry out very quickly and can become brittle. If using frozen wrappers, thaw them according to package directions, usually at room temperature for 30-60 minutes or overnight in the refrigerator.
- Ensure your filling consistency isn’t too wet before rolling. If it seems overly moist after cooking, let it drain in a colander for a few minutes. A well-cooled filling (Step 4 of Instructions) is also crucial to prevent soggy wrappers and tearing.
- When practicing your rolling technique, avoid overstuffing your spring rolls; this makes them harder to roll tightly and more prone to bursting during frying. Aim for a snug, compact roll.
- Maintain the correct frying oil temperature of 350°F (175°C). This is vital for crispy, non-greasy results. Test with a small piece of wrapper; it should sizzle immediately and turn golden in 30-45 seconds.
- Fry in batches and do not overcrowd the pot when frying. This lowers the oil temperature, leading to oily spring rolls. Fry in batches of 3-4 at a time.
- For draining after frying, transfer cooked spring rolls to a wire rack set over a baking sheet. This allows air to circulate, keeping them crispier than if drained on paper towels alone.
- As a Shiitake mushroom substitute, if you can’t find dried shiitake, you can use about 1 cup of finely chopped fresh shiitake or cremini mushrooms. Sauté them until they release their liquid and start to brown before adding to the filling.
- For the vegetarian protein option, press firm tofu well to remove excess water before crumbling. This helps it achieve a better texture when cooked.
- To seal the rolls, both beaten egg and a cornstarch slurry (1 tablespoon cornstarch mixed with 2 tablespoons water) work effectively. The slurry is an excellent vegan alternative.
- For make-ahead & storage, you can assemble uncooked spring rolls a few hours ahead. Arrange them in a single layer on a baking sheet, cover tightly with plastic wrap, and refrigerate.
- For freezing spring rolls for longer storage, freeze uncooked spring rolls by arranging them in a single layer on a baking sheet until solid. Then, transfer to a freezer-safe bag or container for up to 2 months. Fry directly from frozen, adding a couple of extra minutes to the cooking time.
- Regarding glass noodles prep, after soaking, glass noodles can be quite long. Cut them into 2-inch lengths with kitchen shears, as noted in the ingredients, to make the filling easier to manage and the spring rolls neater to eat.
There you have it! The aroma of these golden beauties frying is pure comfort, and that first crispy bite is a moment of pure bliss. We hope you enjoy making (and eating!) these wonderfully satisfying homemade spring rolls. Get ready for some happy smiles around your table!